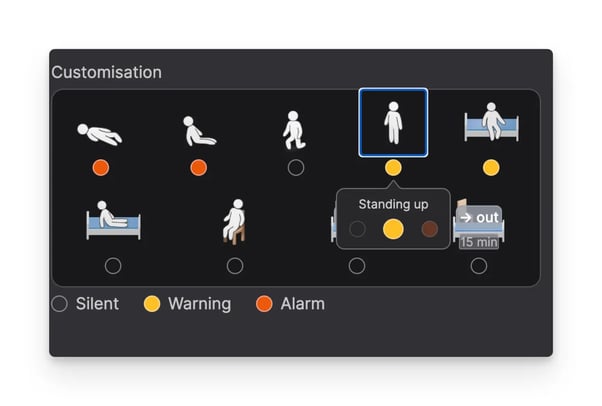
Clicking on a resident allows you to change that action’s notifications. For example click on standing, and say you want to receive an alarm on it instead of a warning.
- Click on an action to open up the notification settings for that action
- Click on the desired notification setting (silent, warning, alarm)
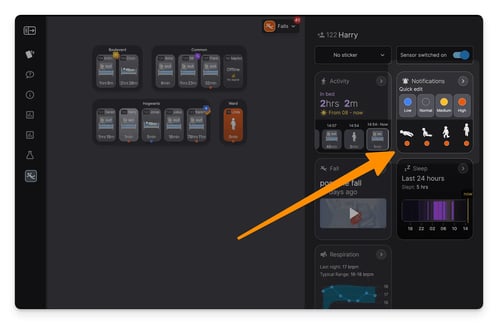
Using quick edit to quickly change notifications
We have the quick edit functionality that allows you to quickly add or remove notifications on a resident you can use the quick edit feature:
- Press 🔵low and we’ll remove all notifications on a resident other than fall alarms.
- Press normal and you’ll receive fall alarms, and warnings for ‘standing’ and ‘sitting on edge of bed’ (these are the default settings).
- Press 🟡 medium and you’ll receive fall alarms, and for all other actions you’ll receive warnings.
- Press 🔴 high and you’ll receive alarms on all actions.
Understanding risk levels
We try to help you understand how many notifications a resident has by adding a little circle to the bottom of the card if they have a lot or very few notifications.
- A blue circle indicates 🔵low risk where you will be receiving nearly no notifications on this resident. Often only fall alarms.
- No circle indicates that the resident has a normal amount of notifications. Usually fall alarms and a couple of warnings
- A yellow circle indicates 🟡 medium risk and you’ll receive quite a few warnings and alarms.
- A red circle indicates 🔴 high risk and you’ll receive a lot of alarms and warnings on this resident.
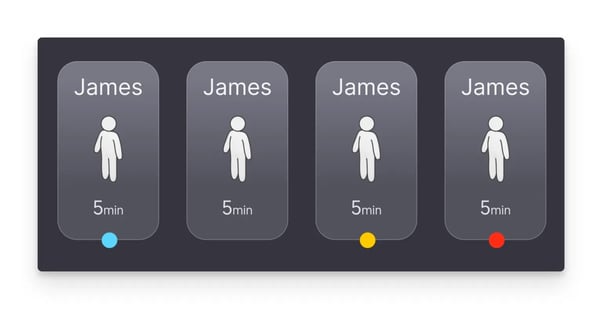
Low risk, normal risk, medium risk, and high risk circles help to indicate the amount of notifications you will receive.
NOTE: The colour of the little risk level circle on the bottom of a resident card is an indicator of how many notifications are selected for a resident, it does not tell you which exact ones are selected. For example in the settings below, the resident has a custom setup with enough alarms to give them a medium risk circle, but not enough alarms to give them a high risk circle.
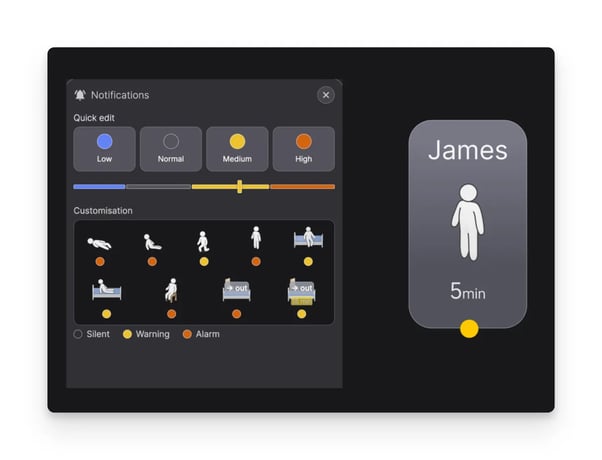
James has enough alarms set that he is a medium risk resident (therefore he receive a yellow circle on his card), but he does not have enough alarms to be high risk.
Time-scheduled notifications
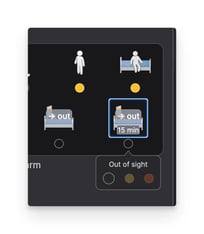
For activities where the resident leaves the room, you can choose to receive a time-based alarm that only triggers when the resident has been out of the room for longer than the specified time period. For example, if a resident is independent but you want an alarm if they have been in the bathroom for more than half an hour.
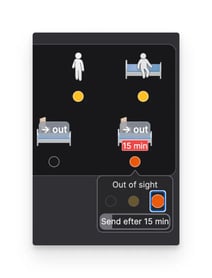
- Click on a time based action (the one with the 15-mins text below it)
- Set to warning or alarm
- Set amount of time before alarm is sent again (default is 15 minutes)
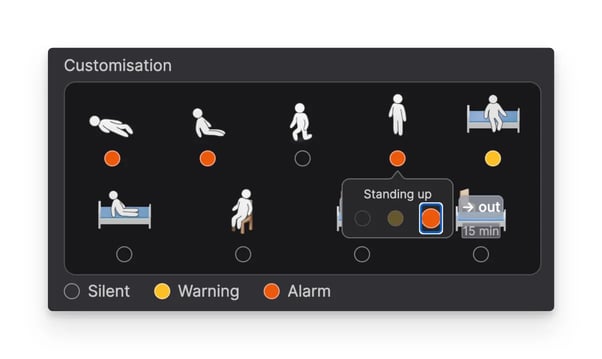
A time based alarm set to silent
Default time based alarms
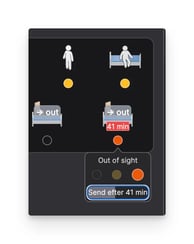
A time based alarm changed to send a sound after 41 minutes.
Silent-mode
It's also possible to put the phone on silent mode if, for example, you are with a resident whom you do not want to wake with alarms or warnings.
Navigating to alarm settings on the computer
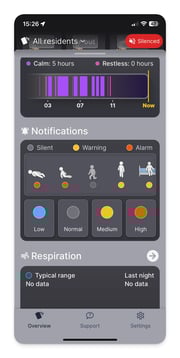
- Click on the resident card to open the information panel
- You can use the quick change settings directly from the minimised version of the notifications box
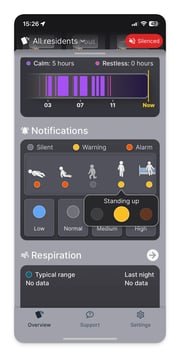
- Click on the small arrow on the notifications box to expand it
- Change the settings as required
The minimised notifications box found in the information panel

The expanded notifications box, with the ability to customise individual notification settings
Navigating to alarm settings on mobile
Alarms work the same on mobile as they do on the computer.
- Tap on a resident card
- Scroll down to their notification settings
- Use the quick edits (low/normal/medium/high) to quickly change settings
- Scroll left and right through the action list to see all settings
- Tap on a specific action to change its notification settings